

Overview
The CreateFolder workflow action generates a folder in HubSpot’s File Manager and links it to the triggering record—whether it’s a Ticket, Deal, or a custom object. You can define the folder’s name dynamically and control its path structure, creating nested folders on the fly if needed.
Before you begin
-
Portal ID: Locate your portal’s ID under WoodsPortal Admin > Client Portals.
-
File Manager access: Ensure your HubSpot user can create folders in the File Manager.
Step-by-Step Instructions
-
Create a Workflow
-
In HubSpot, navigate to Automation > Workflows.
-
Create a new workflow (e.g., Ticket-based) and set your enrollment trigger (e.g., ticket status change).
-
-
Add the CreateFolder Action
-
Under Actions, search for WoodsPortal Actions and select CreateFolder.
-
-
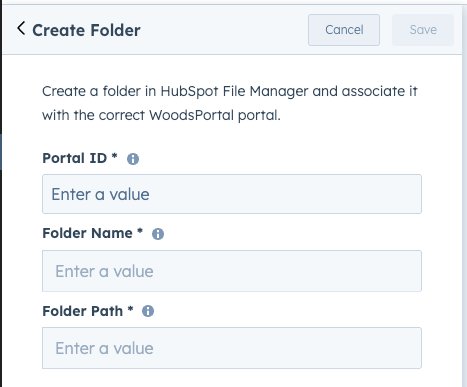
Configure the CreateFolder Fields
-
Portal ID
-
Paste the portal ID copied from Client Portals in WoodsPortal Admin.
-
-
Folder Name
-
Enter a static name (e.g., “Support Ticket Files”) or click the token picker to insert dynamic values (e.g.,
**ticketname**, associated deal properties).
-
-
Folder Path
-
To create in the root folder, enter a single slash:
/ -
To nest folders, provide a full path (e.g.,
/FolderOne/FolderTwo/FolderThree).-
If intermediate folders don’t exist, WoodsPortal will create them automatically before creating your final Folder Name inside the deepest folder.
-
-
-
-
Activate the Workflow
-
Review your settings and turn the workflow On.
-
Each time a record meets the trigger criteria, WoodsPortal will create and associate the folder accordingly.
-
Troubleshooting
| Issue | Resolution |
|---|---|
| Folder not appearing in File Manager | Confirm your Portal ID is correct and the workflow has run on an enrolled record. |
| Nested folders not created | Verify your Folder Path syntax uses forward slashes (/) and no trailing slash on the final segment. |
| Dynamic tokens not resolving | Ensure the property you reference is available on the triggering record or its associated object. |
.png)