%201.png)
WoodsPortal Setup Guide
Install and Configure WoodsPortal in your HubSpot Account
***Minimum HubSpot license requirements: Content Hub Professional | Sales Hub Enterprise | Service Hub Enterprise ***
1
Installation
Learn how to connect WoodsPortal to your HubSpot account and create your first client portal in just a few simple steps.
2
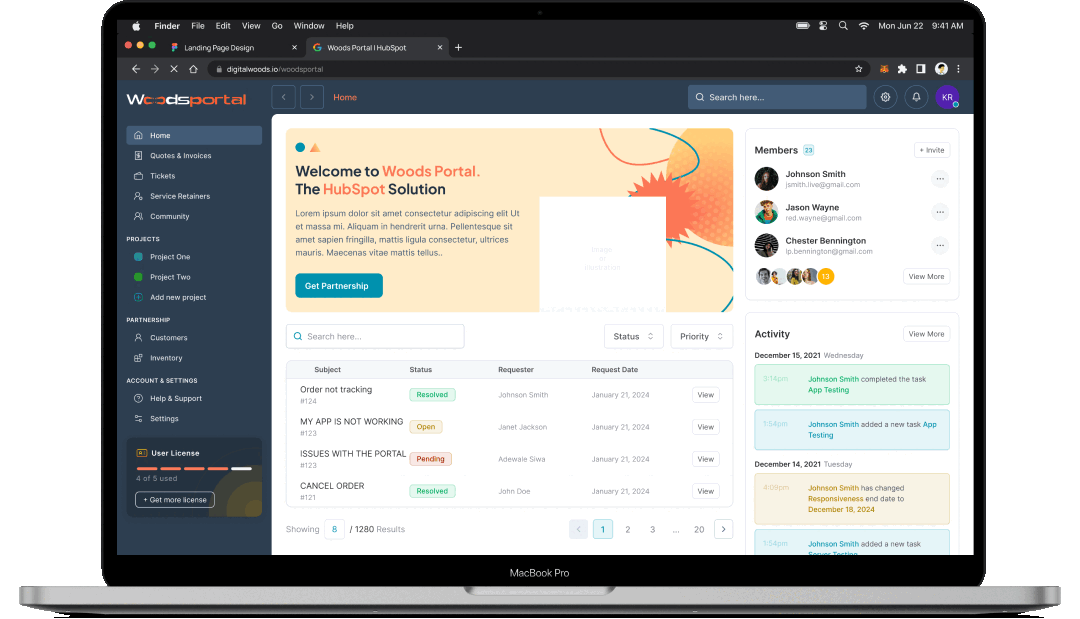
Creating a WoodsPortal Page in HubSpot
Learn how to build and publish a customer portal page using the WoodsPortal theme within your HubSpot website.
3
Configuring Object Record Display with Association Labels
Learn how to select which HubSpot objects appear in your customer portal by setting up association labels in the WoodsPortal Admin.
4
Managing user access
Learn how to grant and revoke portal login access and control which records users see—either at the company level or on an individual record basis—using HubSpot workflows, properties, and association labels.
5
Building Record Creation Form
Learn how to build and customize the form users fill out to create new object records—add or remove fields, include associated object dropdowns, apply filters, and rename labels—directly in WoodsPortal Admin.
6
Create Nested Folders via Workflow
Use the CreateFolder action in HubSpot workflows to automatically create and associate folders in the File Manager for any HubSpot object (standard or custom).
7
Granular Visibility Control
8
Configuring the Record Detail View
Learn how to control which fields appear (and whether they’re view-only or editable), set the display order of tabs and fields, and configure list-vs-board views for any object’s detail page in WoodsPortal.